
In the previous article I talked about automatic versus manual exposure. Please keep in mind that setting the camera to a manual exposure system gives you repeatability in your product pictures. Also, some cameras do not have a manual mode. Most of the Nikon and Canon point and shoot type of digital cameras do have a full manual mode. I have found though that the Olympus and Kodak cameras do not have this ability. If you are going to be using your camera specifically to shoot product pictures for your web site or eBay, you will get better more repeatable results if the camera has the ability to set the exposure manually.
Digital Product Lighting Books from Amazon
Digital Portrait Lighting Books from Amazon
Check out our web page for more digital photo studio accessories 2 Sisters Of Texas

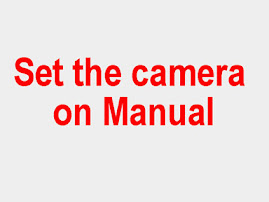
I get lots of questions about how do I set the camera manually. Well, big problem. Each camera brand and sometimes between models of the same brand the systems are different. Read your instruction book It should tell you how to do the following.
#1 Turn off the flash.
#2 Set the ISO (film speed) to a manual mode, probably around 200.
#3 Set the shutter speed and the f-stop.
Why do all of this you ask? Because most digital cameras are designed to take snapshots. When you take a snapshot probably 99% of the time if you were to add up all of the colors in the picture, reds, blues, grays, greens, etc. you would get a neutral gray color. The same is usually true about the densities in your average snapshot. If you added up all of the light, dark, darker, and black areas in a snap shot it usually comes out a neutral gray. So, this concept is programed into the camera. You have to turn this system off because when you are shooting product pictures you very seldom have a picture full of different items, people, backgrounds etc. You normally have one product and one background.
Let's say you are shooting blue jeans on a white background. You do not have any reds in the picture. Just blue and white. So, the camera will try to add red to the picture to get back to a neutral gray. When you adjust the picture in whatever picture control program you are using to get the blue jeans to look right, the background usually ends up pink. This because the camera took red out of the picture. In order for you to get the blue jeans to look right, you had to add red back into the picture. Just pretend that the blue rectangle in the white is your pair of blue jeans. Did you get something like this?

When you started out with this.

Ok, let's pretend that you are shooting a red blouse on a white background.

Did you end up with something like this. A blue or cyan background.

Again, the auto white balance is trying to fix your picture. It is trying to add up all of the colors and get gray. You have to turn that system off. You do that by setting the white balance. You can usually just set the camera for the type of lights you are using like the tungsten setting for hot type of tungsten or quartz halogen lights or if you are using 5000K daylight fluorescent bulbs then you can set it at the daylight setting. Best of all is to do a custom white balance if that option is available on your camera. That way when you shoot items on a white background it stays white and the colors of the products are still correct. Like the jewelry in the picture below.

More to come.


No comments:
Post a Comment